Monday, May 25, 2015

ASL AAR for scenario HS32 A Few Rounds

Played ASL scenario HS32: A Few Rounds on May 23rd with Tycho using VASL.  (love that program!).  If features a 13 squads of first and second line Germans and 3 SturmTigers against 8 squads of elite Canadians and a 76LL AT gun.  Since I got to play with the big toys in "A Breezeless Day" a few months back I took the Canadians and let Tycho have the Germans.  In retrospect that was no favor - despite a 380mm gun those things stink!  (ok, they have MGs and a Negulsnuggiewurfer of 9 too).

Setup - The Germans have to come on from the bottom edge and win if at game end (German turn 8) there are no Good Order Multiman Canadians (other than gun crew) in a board 43 building.

End of German turn 1
Unlike our last game this time I have the hot dice early.  A Canadian squad blasted a German squad off to the right and another one with LMG DM'd another squad further to the left.  The Sturmtigers move forward but forget to fire the Sn smoke thingies.  

End of Canadian turn 1
Discretion is the better part of valor and the Canadians try to hustle out of site.  The squad in I3 was visible to the Sturmtiger though.

End of German turn 2
German Prep Fire the Sturmtigers and both miss!  To-hits were miserable 4 vs the leader and squad in the woods and 5 vs the guy in the woods in I3.

End of Canadian turn 2 (just before Advance phase actually)
Since the Germans decided to advance the squad off to the left decided to fire and gets lucky, breaking the German squad in the middle and any chance for a firegroup.  A Sturmtiger finally hits but does not roll well enough for a kill, a MC4 result just breaks the squad fired upon though.

German turn 3 through Rout Phase
The Sturmtigers move foreward to pin the Canadian 9-1 mg nest in place and then they try to move up.  A squad and a half make it but another squad is DMd but the Canadian squad on the left (they deserve a hero medal by the end of the game).  The Germans also do the Sturm-pin routine on the other Canadian squad off to the right but the 8-1 leader and his LMG squad manage to keep a German squad from getting close enough for CC.

End of German turn 3
The Germans did manage to get a half squad or something like that into the rightmost CC, and a squad and a half into the CC with the 9-1, but they are CX.  The 9-1 fires first and gets no result!  (went for both Germans for a 1-2 attack).  Germans fire back and also get no result.  Up in the building to the right the Germans are killed.

End of Canadian turn 3
The squad in the building goes upstairs and DMs the half squad next door, Sturmtiger can not do anything.  The 9-1 group rolls a 5 killing the squad and a half he is with.

End of German turn 4
The Germans make short work of the 9-1 with a 24 straight shot while the Sturms move out for the next phase.  Tycho invokes no quarter so the 9-1 leader low crawls away (the squad was the recipient of the NQ)

End of Canadian turn 4
The broken 9-1 is eliminated by a 24-1 shot while the 458 to the right fends off more Germans.  

End of German turn 5
The 17lber opens fire!  It put a hurting on the German -1 leader and the squad with it.


I rolled well enough that I got a German sniper, which came up 1 and then proceeded to hit the hero squad that had chewed up the German advance the last couple turns.

During this exchange the Germans also rolled the Canadian Sniper which also came up 1 and then proceeded to break the squad at the bottom right.

End of Canadian turn 5
The 8-1 leader group fires on a German squad in the open (behind brush though) and manages to create a German hero!

Needless to say I was not favorbly impressed with that result so the 17lber fires again and runs itself out of HE and exposes itself as well but it does manage to DM the squad that the Hero came from - did nothing to the Hero though.  In the house off to the right the Canadian squad is finally eliminated for FTR.

End of German turn 6
The Germans start the final push on the remaining Canadians.  Two of the Sturm Tigers use their Snuggle Werfers (Sn) to create smoke that their infantry advance behind.  They also move up into position to pound the buildings.  The 17lber fires at the one visible Sturm Tiger and hits the turret, ping!
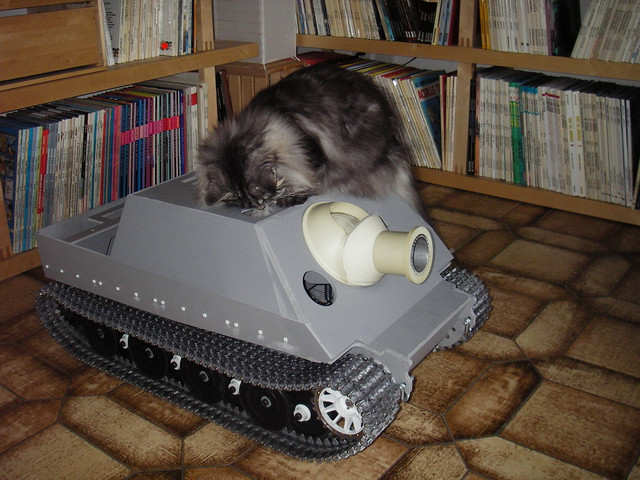
(Wrong vehicle and terrain, but YOU try finding a picture of a SturmTiger... OK, there is the following one)


Meanwhile the "Hero" squad manages to survive 3! interdiction checks while routing away from the Germans that took his building.
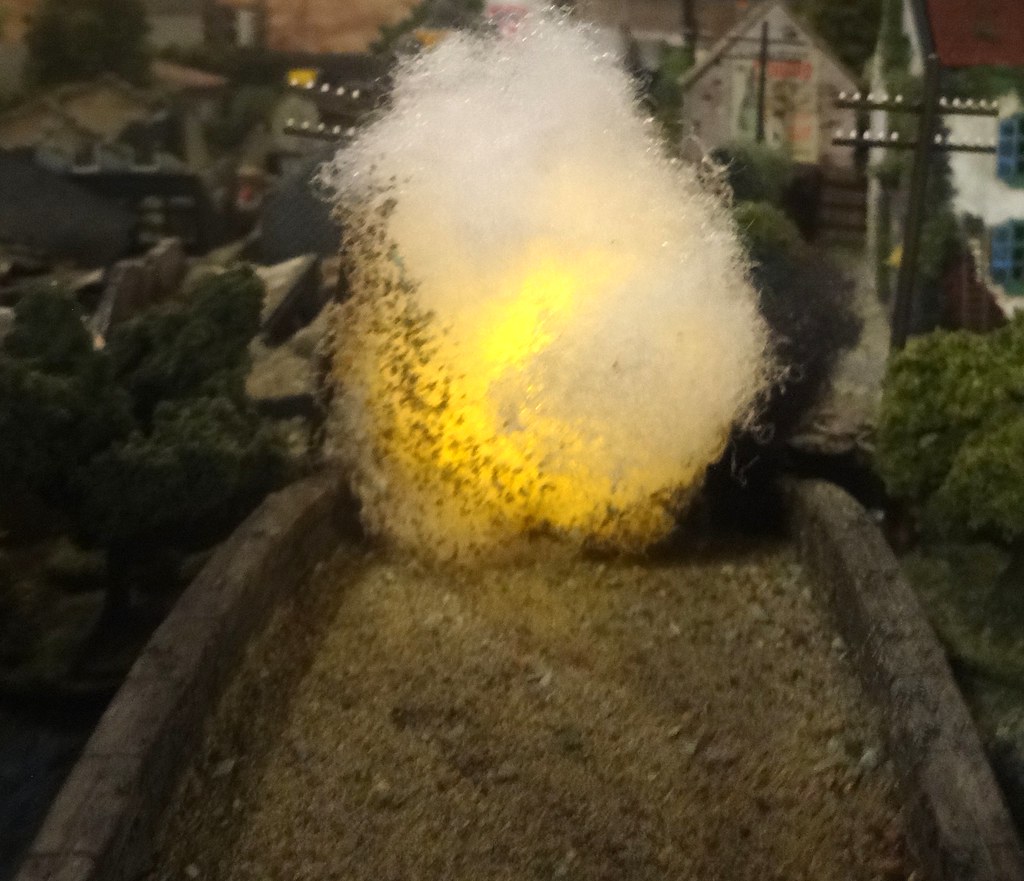
This would force the German player to chase them down or Garrison the buildings at the bottom of board 43, troops they did not have...

End of Canadian turn 6
The 17ber fires yet again, this time hitting and killing a SturmTiger with an intensive fire shot after hitting the wall with the first one.
Then I fired at another SturmTiger with a Piat.  It hits!  On the side!  Tycho then informs me that the hex spine is STILL THE FRONT!
That is what I get for playing other games!  The return fire breaks that Piat toting HS.  I should have assault moved him in between the two SturmTigers and then that other Piat armed HS across from them, almost certainly would have gotten one of the Sturms that way and forced him to waste more firepower.

End of German turn 7
The 8-1 leader and squad shoot up a German squad and DM it.  The 17lber (firing AP) scores a critical hit and kills a squad that moved into the dead Sturm's hex.  The Sturm's surviving crew and a different squad advance into CC with my 458 squad that also had a SturmTiger in bypass to keep him from doing anything.  In the sequential CC the 458 killed the squad leaving just the crew.  (this was taken just before the rout phase, the Hero squad routed away once more!)

End of Canadian turn 7
The Canadians do some position fiddling to stay out of sight, the CC ends with the 458 killing the German crew (with SturmTiger still in bypass)

End of game.
The SturmTiger tried to take a shot at the Ammo Depot in the middle of the street, only problem is Area fire is not allowed for SturmTigers and we did not know what to treat it as.  Ending up calling it ITT and Tycho rolled a 10 for a miss.  If it HAD hit it would have been a huge explosion almost certainly killing everyone within one hex of it (it is the hex with the allied position marker in it).  Having done this it was impossible to get anyone into the hex with the top most squad (though perhaps he could have fired on it and caused a failed MC, did not think of that - odds were very slim since they would have to be quartered for AfPH and concealed target and the 8-1 LMG was still free to fire).  
A very fun and quick playing scenario for the size.  The obvious appeal of three SturmTigers is matched with a 17lber and plenty of open space to deploy it in.  I may be tempted to give this scenario another playing sometime (but there are so many I have yet to play...).

One change I would like to see made is that if an SturmTiger round misses by the TEM then it is considered to have hit but the TEM will be used against the IFT result.  The rule where missing a target in a building does the same thing almost, miss by the number of levels in the building and you hit the building and could rubble it.

Saturday, May 16, 2015

Fast Action Battle the Bulge AAR for turns 1 to 3.5

Played the first few turns of Fast Action Battle the Bulge on Saturday the 16th and despite messing up some rules I am finding that I like this game a LOT.  FAB:Bulge is a block game with an area movement map.  Infantry have 3mp and armor 6 while entering an area is 1 or 2 mp with a plus if it is already occupied (by either side, the Ardennes is congested).  Combat is attacker arty fires, then defender arty, then defender ground units, and finally attacker ground units.  It is possible for the attacker to call of an attack to save hits and for the defender to retreat to lessen the number of hits taken.


I think this is the situation at the start of the game.  I forgot to take a picture at the end of the German turn 1.  Those frontline US units are going to be in pretty good shape considering.

End of US Turn 1.  The US manages to create a solid front line but it is a brittle shell.

End of German turn 2, Peiper was in reserve and raced through the whole created in the allied line to take Verviers!  The US unit in are 27 (to the left near the bottom) held out against all odds though.  Throughout the rest of the map the US line is shattered.

End of US turn 2 (broke a rule - the task force currently in Bastogne should not have been allowed to retreat).  The US position is now precarious - the Germans need two more VP in order to get a sudden death win in a couple of turns and US reinforcements are slim for the next couple of turns.  The 82nd and 101 are on the way however and will have to help hold the line.

End of German turn 3.  Bastogne is attacked but holds out, partly due to that illegal asset.  The German north is looking slim and perhaps a threat there could cause a reaction.  I blew up a number of bridges to slow down the Germans at the start of the turn (both sides can use assets at the start of each player turn).  I have three vulnerable VP spaces and will need to defend two of them or retake them by the end of us Turn 4 in order to keep the Germans from winning.

Although there are few units the US gets a number of assets each turn to try and patch holes in the line, they can also be used to assist combat units so they do not take the first hit from enemy fire, to build or destroy bridges, to reinforce battles, and other functions.  The choices that need to be made are what really drive this game, few units but lots of critical choices each turn.  This one will get repeat playings.

Friday, May 15, 2015

ASL scenario WO3: Counterattack at Carentan AAR

Played WO3: Counter Attack at Carentan with Robert Wriggins on Monday the 4th (slow report...).  It features Germans attacking in Hedgerows and if they break out there is an open area at the top of the map.  A few stugs (one with a 105) and a Marder along along with 9 SS squads vs 6 US squads, 2 Baz, and a 57L at gun.  The armor crews are elite but saddled with a 6+1 leader each - which is a pain for the Germans in this terrain.

The situation at the end of German turn 1.  The platoon that entered on the bottom left broke and ran, all but one squad.  The others came in on the right side.  The Germans have to get off the top of the map by the end of turn 6 and have less than 20 cvp losses.  The Stug at the bottom right malfed on his first shot.  Not a good start for the Germans in the luck department.

The end of US turn 2 (that Baz team AMed to G5 and then advanced to H5) 

Sarge!  You are gonna get me killed!
End of German turn 2.  The stug and a squad with leader fired on the Baz team for no effect.  The Baz fired back and missed!  Another US squad at the bottom left rushed the stug with the bad gun and got into CC last turn, he managed to Immob the tank this turn.  Still not sure why the German player did not drive off when he had a shot.  Perhaps to keep the US squad busy so he could rally his platoon.  Now the Stug can not drive off and the US squad has a 7 CC value against it (immobile and not functional/Manned MG).  Over on the right a US squad is in big trouble...

US turn 2.  The US squad decides to fire, it could not move anywhere without a shot at it (blasted bocage los!).  The Baz fired again and made a burning stug!  In return a German squad DM'd them.  The Germans now have an open path on the right flank!  Bocage is the only thing that could slow them down.
Burning stug!

German turn 3.  The German player pushes on the right as expected.  The US squad takes out the Stug in CC leaving 2 Germans armored vehicles out of 4.  The Bazooka team does not rally and the US has to hustle guys up to slow the Germans.

End of US turn 3.  A US squad tries to reach the buildings in X3 but is blasted in Y3.  This does leave the path open for the US leader.  The Germans in N4 get blasted and have to retreat without their leader who suffered a PIN and did not want to self break.

End of German turn 4.  Time is running out and more bad luck.  The Stug that tried to go through the woods bogs giving a Baz a side shot, Baz misses this time.  A DC toting squad advances next to the US 9-1 leader and MG group.  A German squad moves up and blasts the US squad that broke last turn keeping him DM.  Finally the German squad on the bottom left of the map is fired on while AMing and is forced to surrender.

End of US turn 4.  The Baz takes out the Bogged stug and the German squad keeps the US squad up top DM.  Germans need to hustle!

End of German turn 5 and the game.  The US Squad near the top of the map rallies and fires on the Germans moving up, killing the squad and breaking the leader.  We counted up the remaining possible German exit points and found they did not have enough to win the game.  The loss of the Stugs and getting bogged down on the right is what did it.  The 6+1 leaders in each tank made them pathetic for fighting in the bocage area but the Baz would have needed luck in order to hit them if they were moving (9 at one hex range -2 for moving, -1 for Stug size,and possibly more for MP in LOS).  I was thinking of putting my BAZ guys in the road to force an OVR attack since a 0 hex range is an 11 to hit base...  This scenario is deceptive, the amount of time needed to get off the map snuck up on both of us, the Germans REALLY need to hustle or they run out of time.  Given a choice between fire or movement the German almost always has to move!

Monday, May 11, 2015

I Ain't Been Nuked Mum Playtest at SJCW club meeting

Played another playtest round of IABNM at the club on Saturday.  There was only one other game this month, a game of Angriffe that ran after the IABNM game was finished, I had to miss out on that one so only one picture of that being setup.


For the IABNM game it was the same scenario as I played last time but the result was VERY different.

The board being setup, should look familiar.  This time I placed the woods close to the Soviet entry edge and left a larger open area.  The US forces would setup anywhere to the left of the cards you see on the table.  (roughly).

The playing card is a blind, further back (in the blurry picture, sorry!) is the Soviet pre-game smoke barrage.  On the right hand side the Soviets are charging right out in the open!  (they did not see the results of the last game!)

Hard to see from here but the Soviet blinds are spotted (as Phil looks on...) and the M1A1s make short work of a bunch of them (the M1A1s are in the town just beyond the bend in the river).  Further back a batch of M2 Bradleys opened fire with Missiles  and took out some more T80s as well, things are going very badly for the Soviets.

The rest of the Soviet force is spotted and fire erupts across the board in both directions.

End of the game (which only lasted for 3 rounds of cards).  Anti-Tank combat is VERY deadly.  All of the M1A1s were destroyed in two turns by 10 or so T80s while the M1A1s managed to kill 10 or so T80s in return.  A couple of M2 Bradleys were also destroyed.  For their loss the US managed to destroy two ZSU-23-4 vehicles, the Forward Soviet forward observer vehicle, and nine or so BMPs.  At this point I called the game for the US.

Scenes of devastation.  Three dead BMPs and shocked surivors, further up are the two ZSU-23-4s, another BMP and behind the woods three BMPS running for cover.  Further up from that is another platoon of BMPs, one of which was destroyed.

US losses are not so bad.  Up front an M2 Bradley is destroyed and another one (in the open) no longer has functioning armament and is shocked.  Back in the woods another M2 is down.  The last bit of woods has a group of M901 tow vehicles.  Arty was going to be brought down on them but the spotter was destroyed before it could be brought in.
The Soviets charged down the road in the open which allowed them to be spotted by the US dummy blinds (all of them spotted in one turn pretty much).  After that the real US units had a turkey shoot.  Armored combat in this game is very deadly and quick (no buckets of dice) so getting spotted and fired on is usually decisive.  For my next game I will have to try a mostly infantry affair in tighter terrain - using inches for measurement rather than CM as was done for these past two games (for seeing how missile combat worked out - it is deadly but tank guns are deadlier).

Sunday, April 26, 2015

I Ain't Been Nuked Mum!

Played a playtest of IABNM again yesterday.  Soviets attacking a US position circa 1989.  I am planning to run a similar scenario (with modifications based on this run through) at the SJCW group meeting on May 9th.

Soviet Forces are attacking to seize 2 of 3 bridges across some river.  Lots of tanks and a group of BMP infantry vs 2 platoons of Americans in M2 Bradleys, an M901 AT Company, and a platoon of M1A1s.  It was a slaughter...


Prepare for Battle!  The table setup 4' by 8' and we will be using CM for measurements.  The US will setup on the far side and have to stop the Soviet steamroller.

A little closer in with the blinds in place (I use playing cards as blinds.  This is the center of the US defense.

A pre-game arty attack puts a hurting on the US right flank!  (I could not find the word stonk and used a regular barrage rather than the IABNM stonk rules - found the correct rules today and will be using them in the game on the 9th).  Black squares are "built up" areas of hard cover, buildings are simply for show.  The 4 M2s have suffered a loss of action (orange) and most are shocked (white).  

A T80 Company (I used a single card per T80 company, need to make more cards) destroyed two M2 Bradleys after passing by the woods.  M2s try to fire back on their card - OOOPS, no firing Wire Guided missiles over water!  (first change for the game on the 9th noted.).  One of the remaing M2s dashes for the bridge to shoot across it with the ITOW (can not shoot and move so has to hope he lives)

Soviets move up in the center, US Blinds card did not come up for 4 straight decks allowing the Soviets to move up without being spotted.

The US Blinds finally appear and the M1A1 platoon opens fire!  They destroy 3 T80s on the right flank including one on the bridge - see the picture 2 down from here.

T80s in the center (another Company) activate and destroy two of the M1A1s.  The last two manage to fire a bit longer.  The T80s also managed to destroy two of the M2s from the HQ platoon (City on the left).  At this point we called the game.

The remains of the US right flank.  The Infantry were pummeled by the T80s firing HE and only one Bradley was left alive.  Changes for the next game are to move the river further back and have the US allowed to setup on either side, to put the off board AT missile card in the deck right away (was waiting for the HQ to unmask and call it in), and allow the soviets to start in a woods line rather than come in from off table - this will allow the action to start a little sooner and allow the Soviet arty into the game along with the US missile strikes from off-board Apaches.  
The IABNM rules will be published by Too Fat Lardies and are currently in Playtest.  I can't say for sure when they will be done but they are very far along now.